Create Campaign: influencers / e-commerce
Campaign with influencers and e-commerce
To get started, open Hypolake and click the “+” icon located on the left of the page.
Now let’s go to the step-by-step of our campaign.
- Name
1.1.Fill all the fields with your campaign’s data.

- Type
2.1. Select only one campaign type
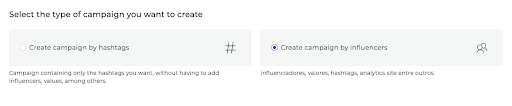
2.1.1 Choose Hashtag Type if you want to monitor your results only by hashtag
2.1.2. Choose the Influencer Type if you intend to analyze posts from one or more influencers
- Contractor
3.1. Fill in the contractor’s information for this campaign
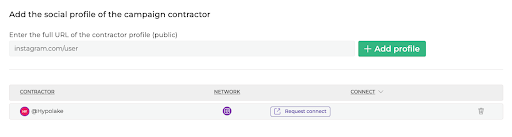
3.2. Put the url of the contractor with “instagram.com” followed by “/username”. E.g.: “instagram.com/hypolake”
![]()
3.3. Once you have managed to add the contractor’s profile it is important that you click on “Request Connection” and send it to the contractor, because only then, we will be able to get more detailed data from this profile. And remember that we will not publicly disclose any personal data from this profile.
- Hashtags and profiles
4.1 If you have chosen the hashtag-only campaign option add each of the hashtags as follows: #example. And press Enter at the end of each one.

4.2. If you have chosen the Influencer campaign option, you can add the hashtags as in step “4.1.” and the profiles as follows: @username.
If you have selected the Hashtag campaign option you are now at the Save step and can finish creating your campaign.
If you have selected a campaign by Influencers continue reading this article.
- Objective
5.1. Select one or more options to continue.

5.2. If you are looking for engagement and knowledge select Social Networks/ Influencers
5.3. If your goal is to manage traffic and conversions select “Website/ Virtual Store”.
5.4. You can also select both options and analyze a tracked link.
If you have selected only the “Social Networks/ Influencers” option, go to step 6 to complete your campaign, as you will then need to proceed to the “Save Campaign” step.
If you selected the Website option or both, continue from step number 7.
- Influencers
6.1 Select “Add Influencer” to add one influencer at a time, or “Import Influencers” if you want to import a file with multiple influencers.
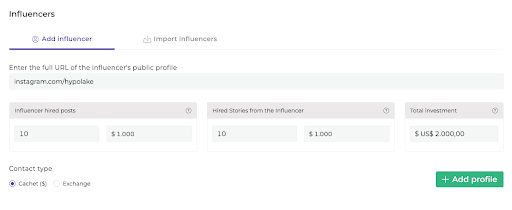
6.2. add influencer: fill in your campaign data such as profile, posts and stories. Finally, click “Add Profile”, to save the information regarding a profile.
6.3 Import Influencers: if you want to add several influencers, you may prefer this option.
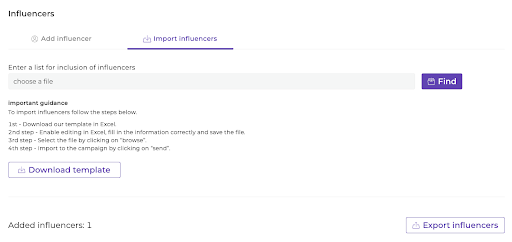
For all the data to be read by our system correctly, download and fill out our template spreadsheet by clicking on “Download Template” and when you are done filling it out, click on “Choose a File” to upload it.
- Integration
7.1. So that we can analyze the conversions generated by the influencers in your campaign, by logging in with your Google Analytics account by clicking on “Sign in with Google”.
- Information Website/ Virtual Store
8.1. Fill in as the data is filled in.
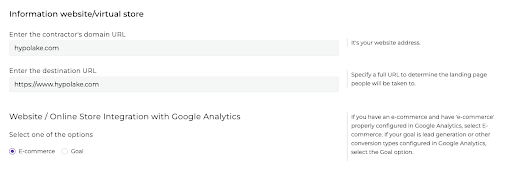
8.2 The destination URL is the page to which the user will be taken (review) (the user will be forwarded from where? Is this the page we will review the data?)
8.3 Under “Website / Online Store Integration with Google Analytics” select the e-commerce option if your store is connected to GA, but you don’t want to or don’t have Goals set up in your GA account. Select “Goal” if you want to do an analysis based on the configured Goals.
8.4 You can also export influencers after adding them by clicking “Export Influencers”.
If you selected only the “Website/ E-Shop” option, your campaign can now be finalized and saved. If you also selected “Social Media/Influencers”, please continue checking item 6 of this article and return to item 9 to finish.
- Track links
9.1 To generate a track link, fill in the contractor’s URL and e-mail address.

By clicking on “Send Link” an e-mail will be sent to him.

We hope this article has helped you. If you still have questions, please contact our support.